Requirements for a Tier 2 (General) visa
29 Jul 2020, updated 15 Aug 2020In this chapter I’ll detail:
Note that the information here is:
- Specific to our unique circumstances
- Reflective of the rules, policies, and requirements, as of the time of our original application for a Tier 2 (General) visa back in 2015; if we are aware of any changes since, it will be called out
If you are planning to apply for, or currently are in the process of applying for a Tier 2 (General) visa then you must refer to the official guidance released by the UK Government at the page for Tier (2) General visas. If you are considering other immigration routes (such as coming to visit as a tourist, or to study, etc) then you can find the official guidance of the UK Government at this visas and immigrations page for all the routes.
Gathering the required documents
Even prior to us engaging with PwC we’ve already independently and thoroughly reviewed the requirements for immigrating to the United Kingdom to ensure that we are aware of what is needed and that there are no surprises. All of these can be found and are clearly listed at this guidance page by the UK Government.
This meant that when PwC informed us of what documents we needed to prepare and submit, none of it came as a surprise.
List of required documents
This is not something that you can do in one go; for instance, the application forms only become available once you’ve completed the online application and you are sent PDFs to print.
Gather these all in parallel so that you have everything ready to bring with you in your application appointment.
-
Completed and signed application form
This is a signed print-out of the application form of the main applicant. Back in 2015, this was the VAF9 form, but as of the time of writing (in 2020) the VAF9 form has been withdrawn and was replaced with the VAF2 form.
Applications are done online. The application for dependants (e.g. your family members) is done separately using a different link.
-
Completed and signed application form for each of your accompanying family members
This is a signed print-out of the application form of the main applicant’s dependants, which in my case is my spouse.
Back in 2015, this was the VAF10 form, but as of the time of writing (in 2020) the VAF10 form has been withdrawn and was replaced with the VAF2 form.
Applications are done online.
-
Two recent colour photographs taken in accordance with Home Office requirements
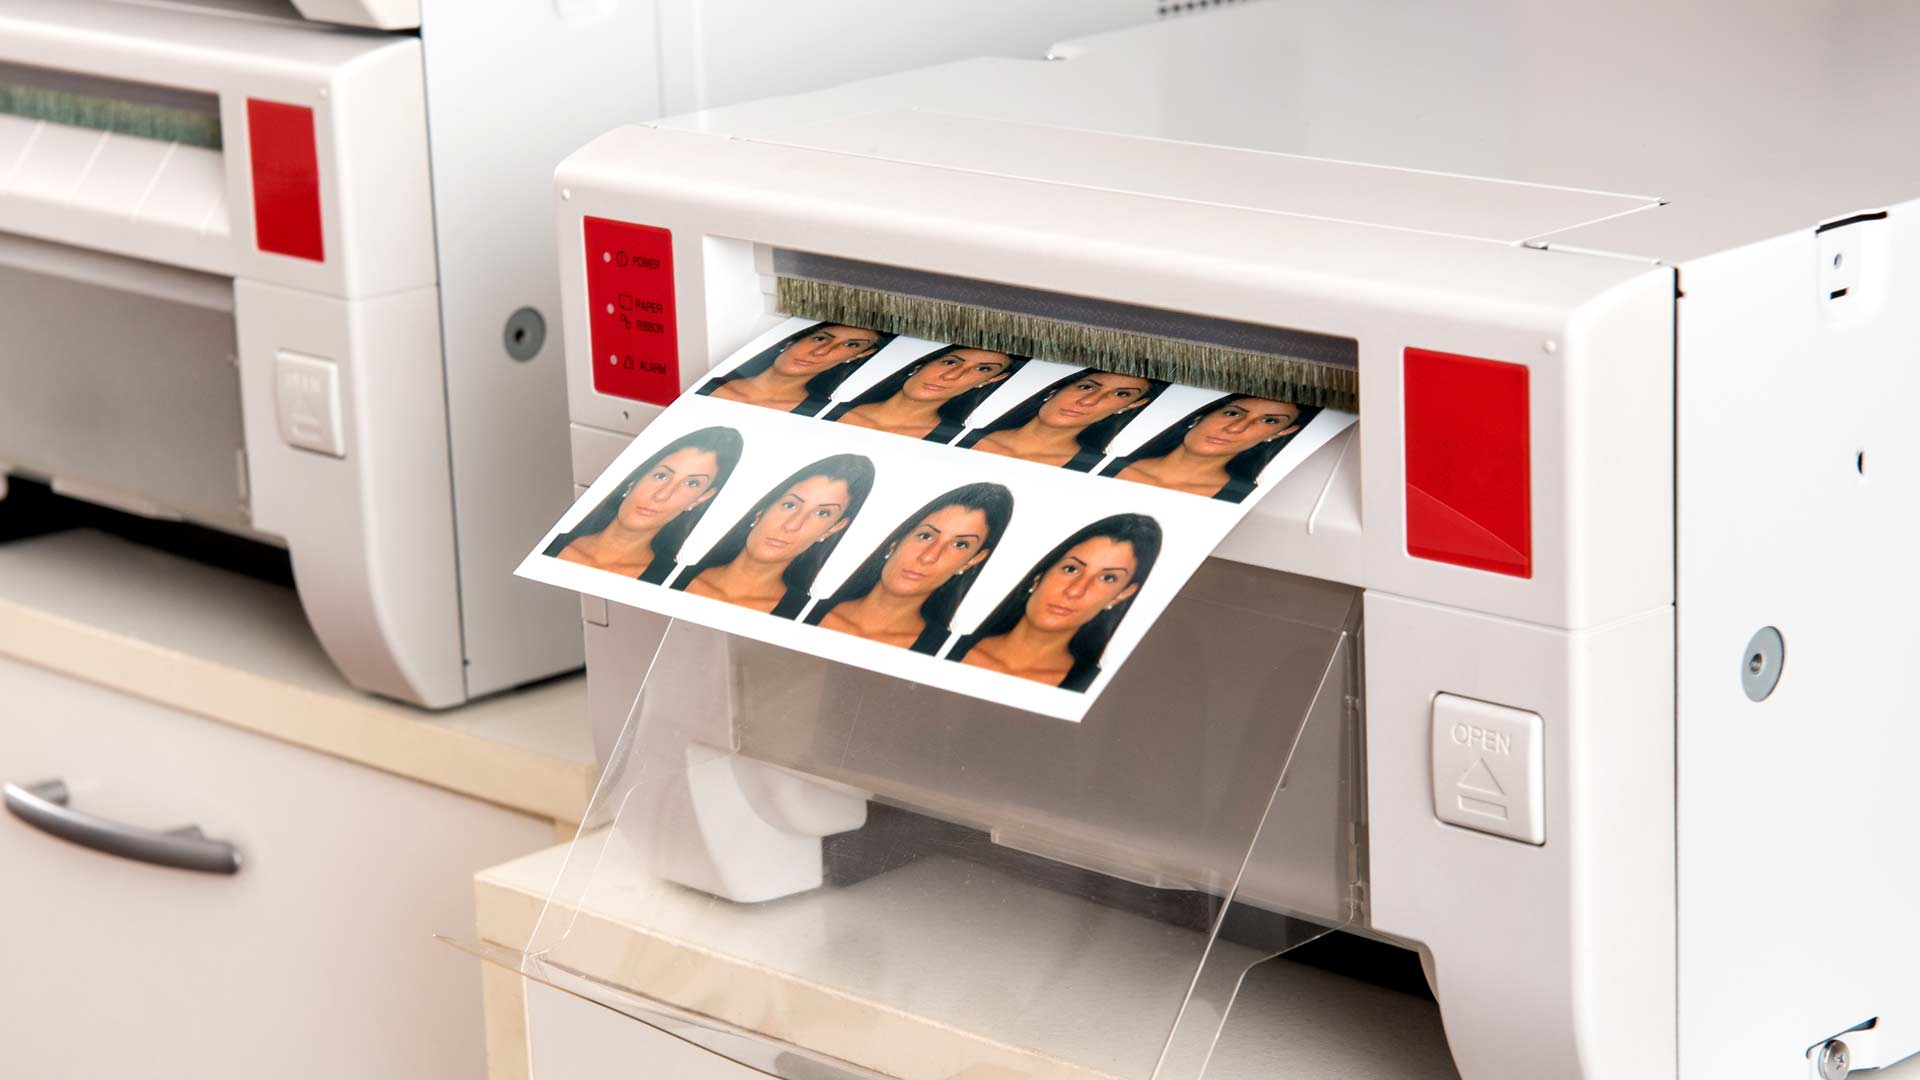
As of 2020 only one photo is required for each applicant (meaning one for you, and one for each of your dependants), and your photos will also be taken digitally along with your biometrics (i.e. fingerprints) as part of your application appointment. The photographs you submit must comply with the published Home Office guidelines for passport photos.
-
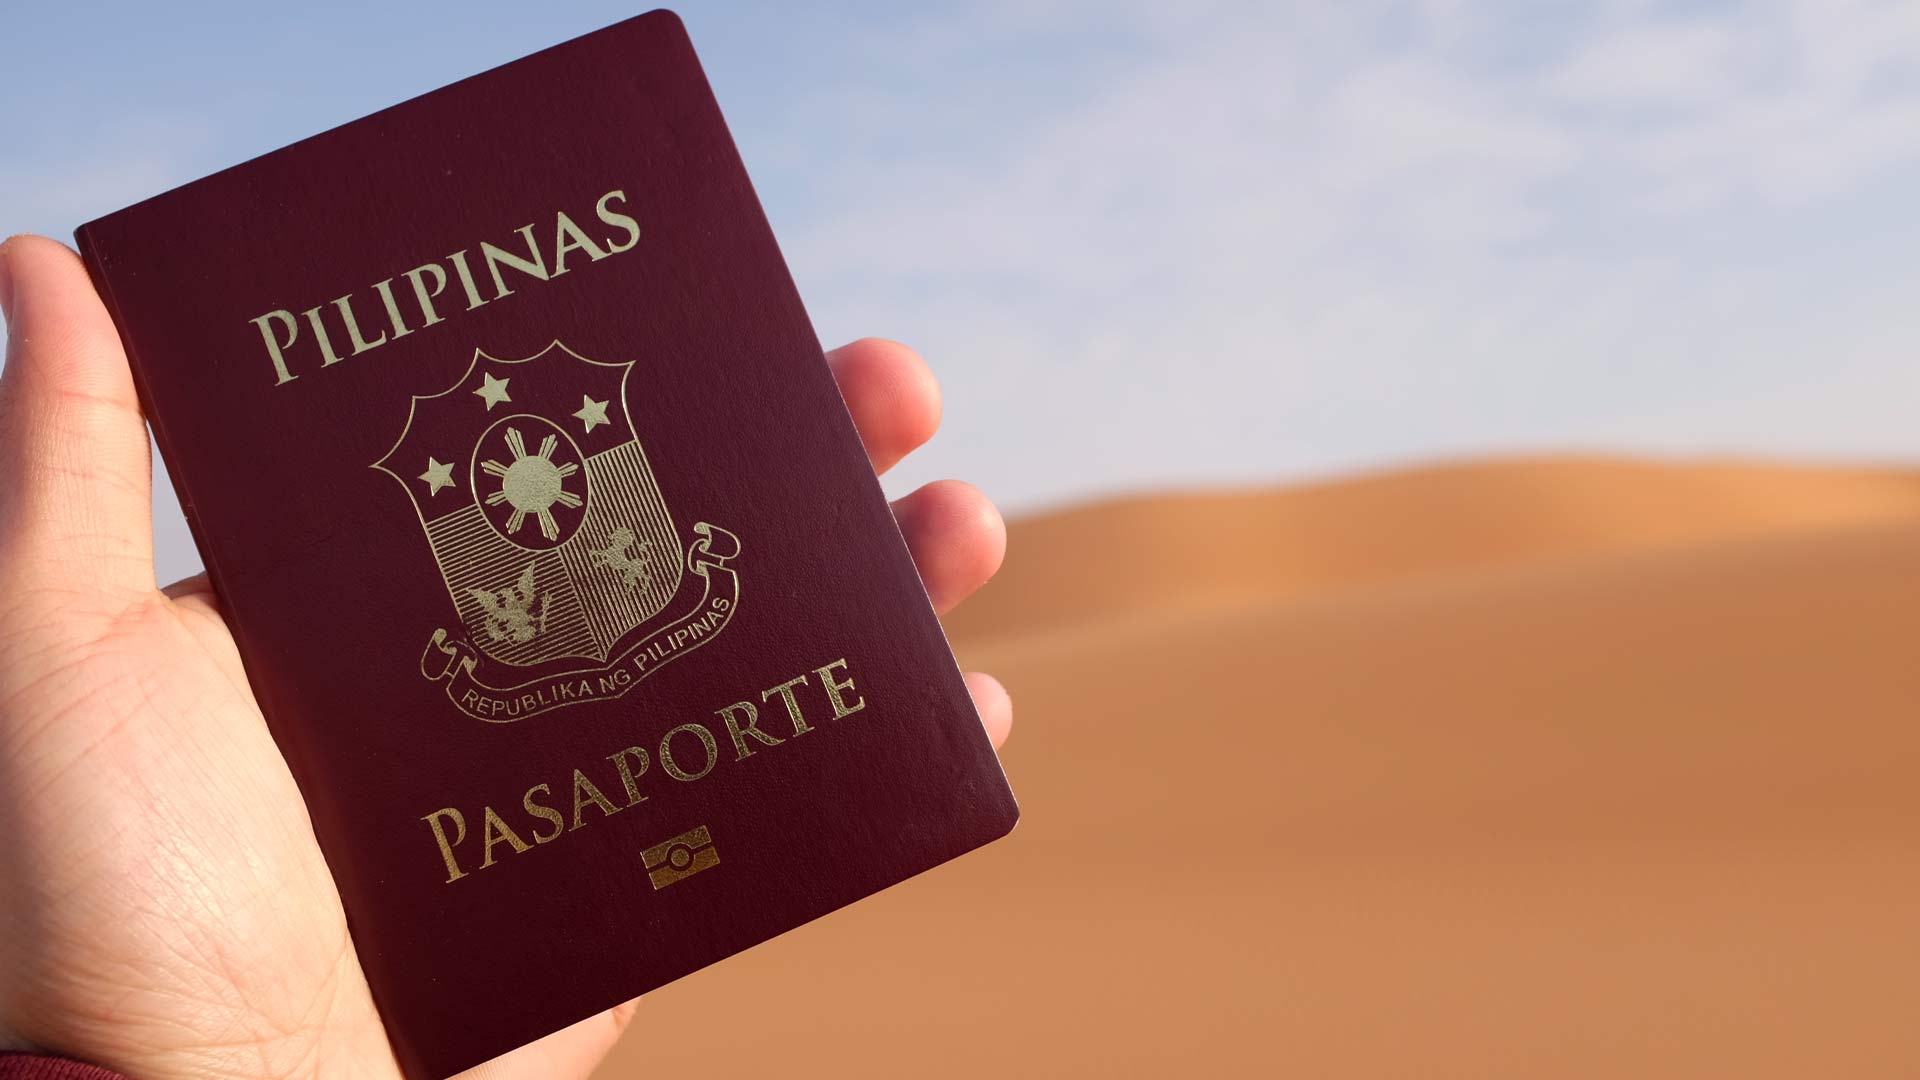
Your original, current passport, and any expired passports in your possession
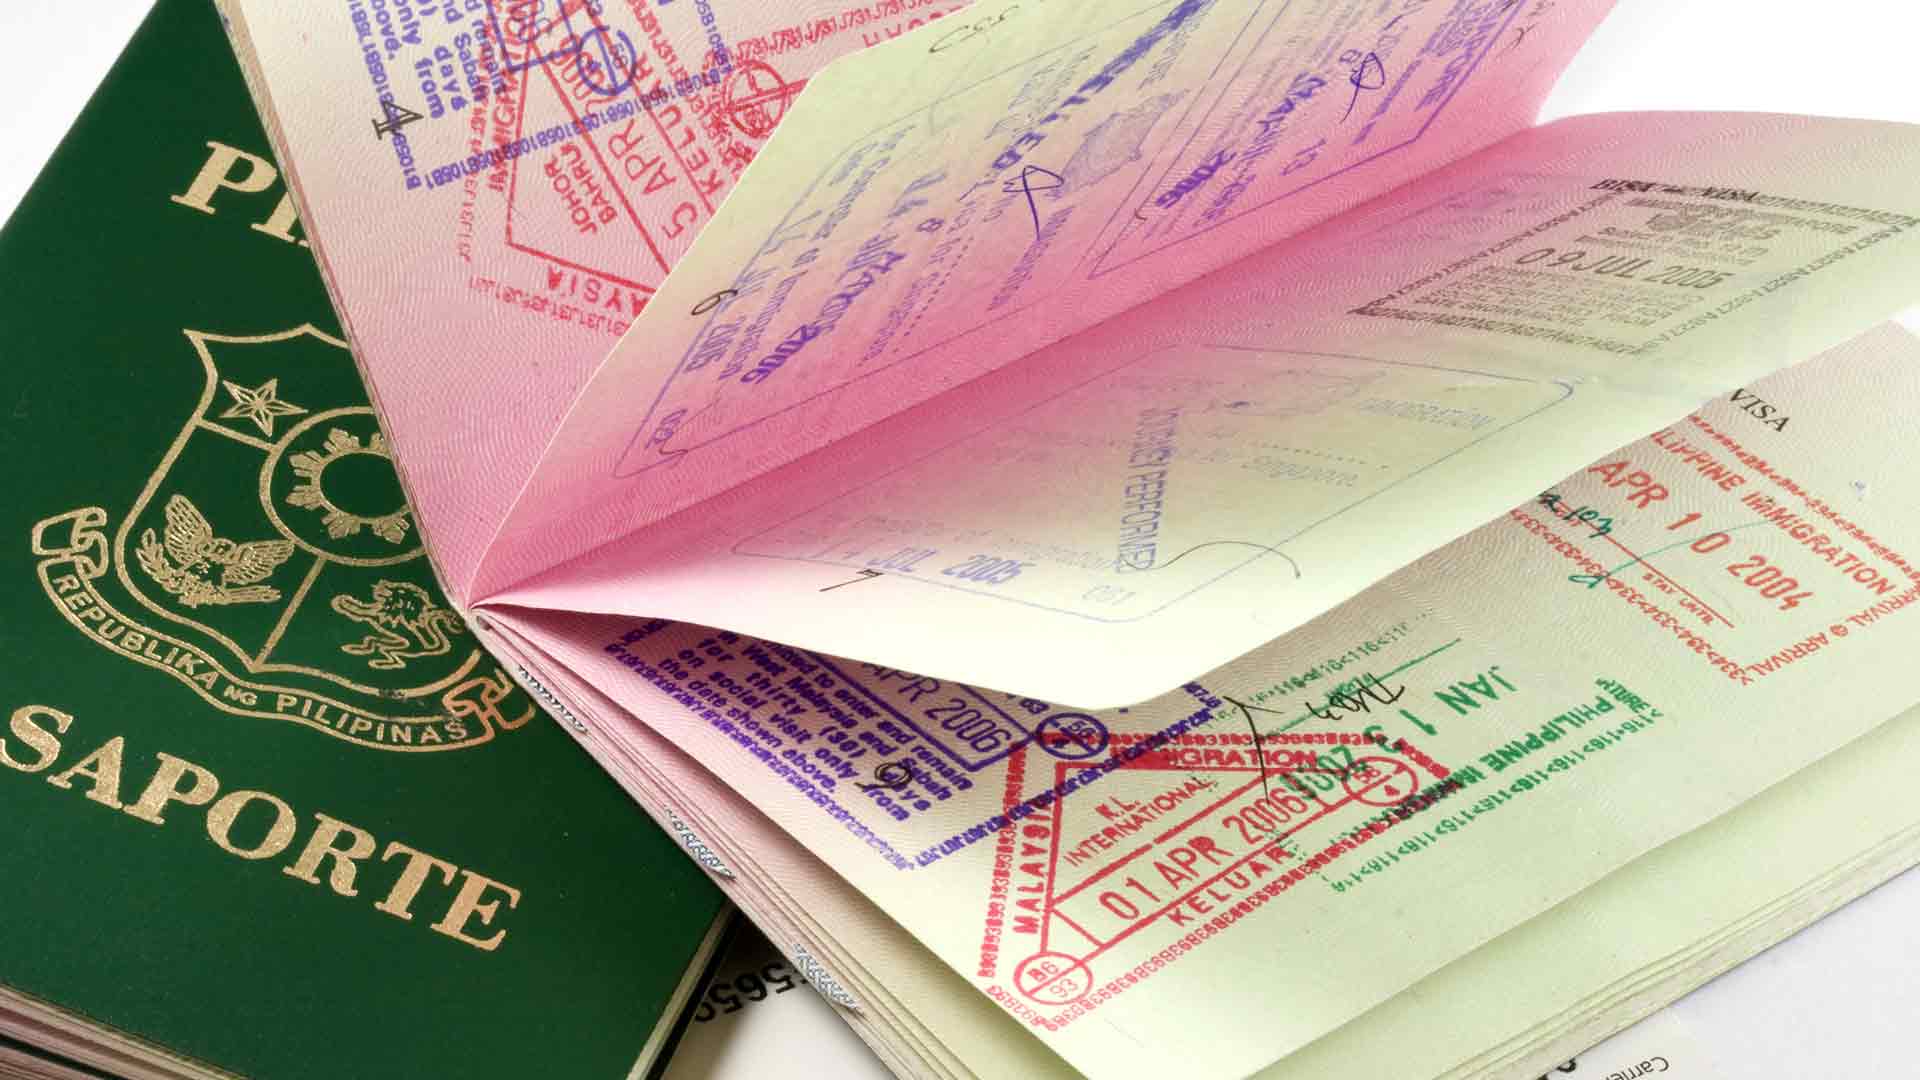
Ensure that you have a current, valid passport. All previous passports in your possession need to be submitted as well.
-
Your accompanying family members’ original, current passport, and any expired passports in their possession
Ensure that your dependants (my spouse in my case) have a current, valid passport. All previous passports in their possession need to be submitted as well.
-
Certificate of Sponsorship
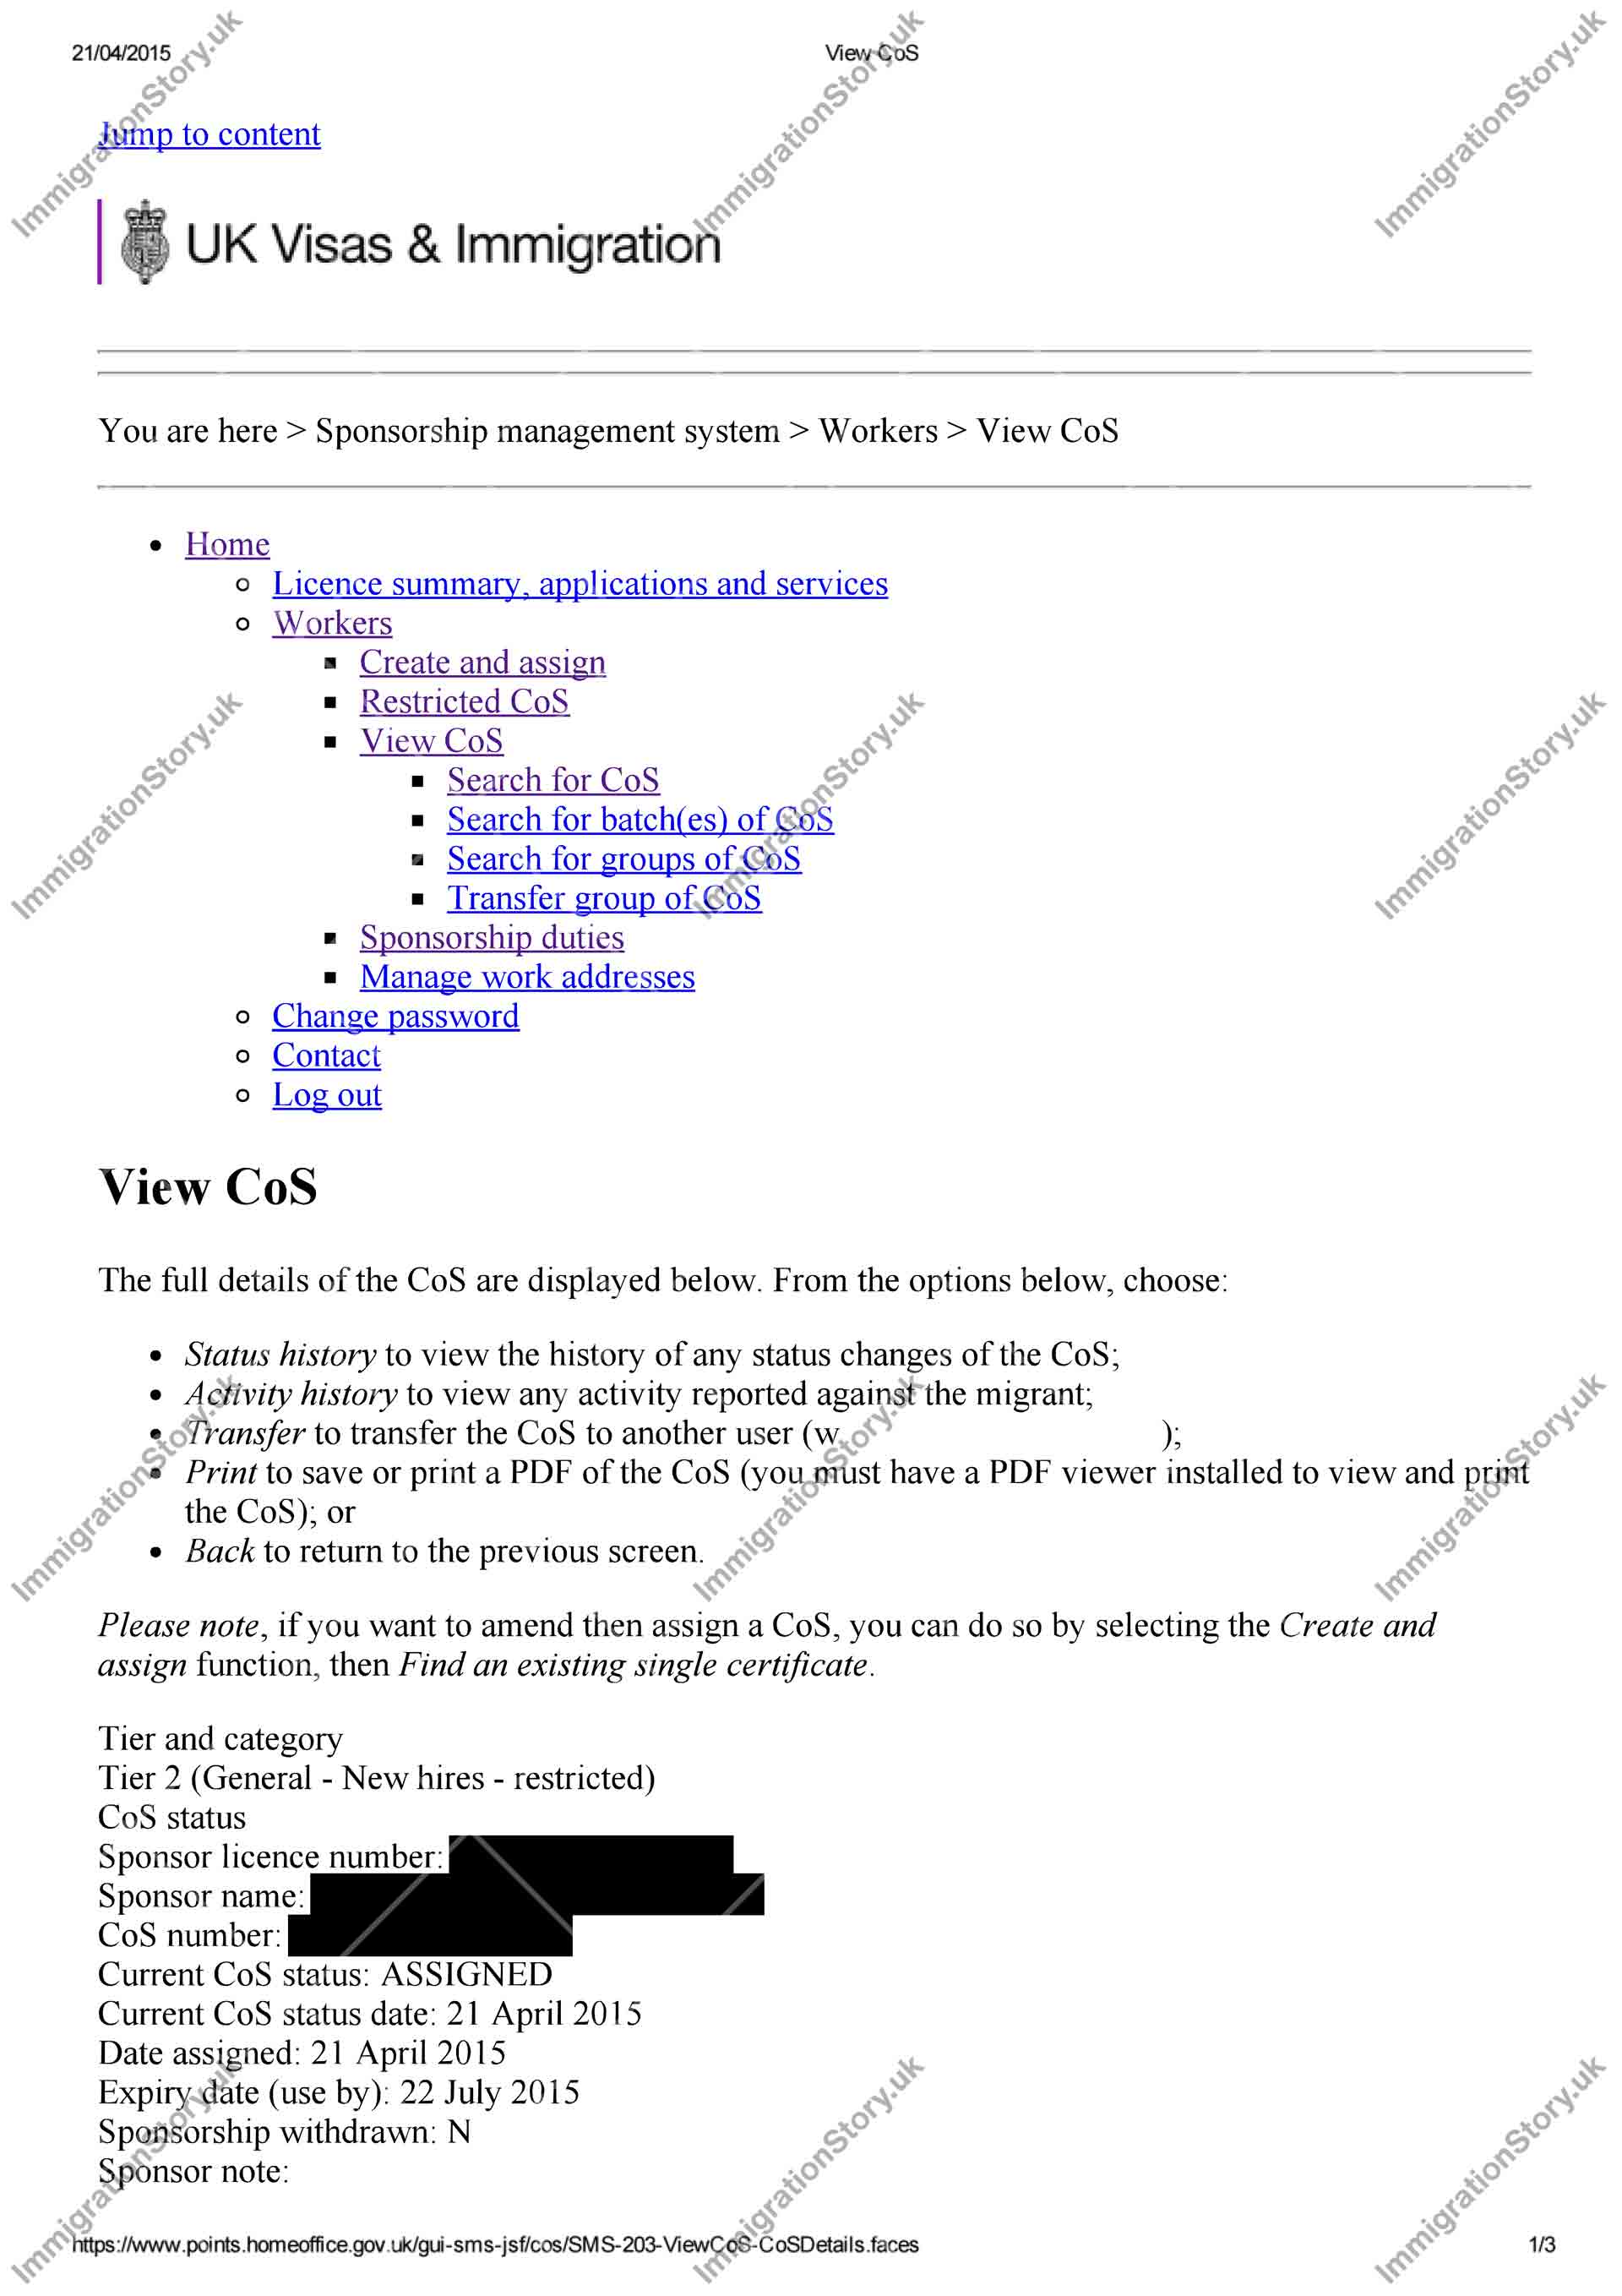
Your sponsoring company should provide this to you. More details can be found in the the following section outlining the requirements for the sponsor. Note that this is not a physical certificate; this is an electronic record and the two important pieces of information are:
- Certificate of Sponsorship number
- Sponsor’s licence number
Once a certificate of sponsorship is “assigned” to you by your sponsor, it becomes time-limited and will have to be used within three months as part of a visa application, otherwise it expires. Most companies thus will only complete this final step when you are ready to make your visa application, so expect this to be one of the last things that you will get.
Check all of the details of the certificate of sponsorship very carefully (such as the spelling of your name, your passport number, and so on); but in particular pay special attention to:
- Status: it should say “ASSIGNED”
- Expiry date: it should be valid for when you intend to submit your visa application
- Sponsor certifies maintenance for the migrant: it should say “Y” if you’ve agreed with your sponsor that they will maintain you and your dependant (i.e. you don’t have to submit proof of funds)
-
Points based system Appendix 5: Tier 2 (Skilled Worker) self-assessment
In 2015, Appendix 5 was required for Tier 2 applicants, which details the breakdown of the number of points an applicant has earned towards the visa they are applying for. This requirement has been withdrawn and is no longer needed as of the time of writing in 2020 as the information is now taken from elsewhere.
-
VAC appointment confirmation notice
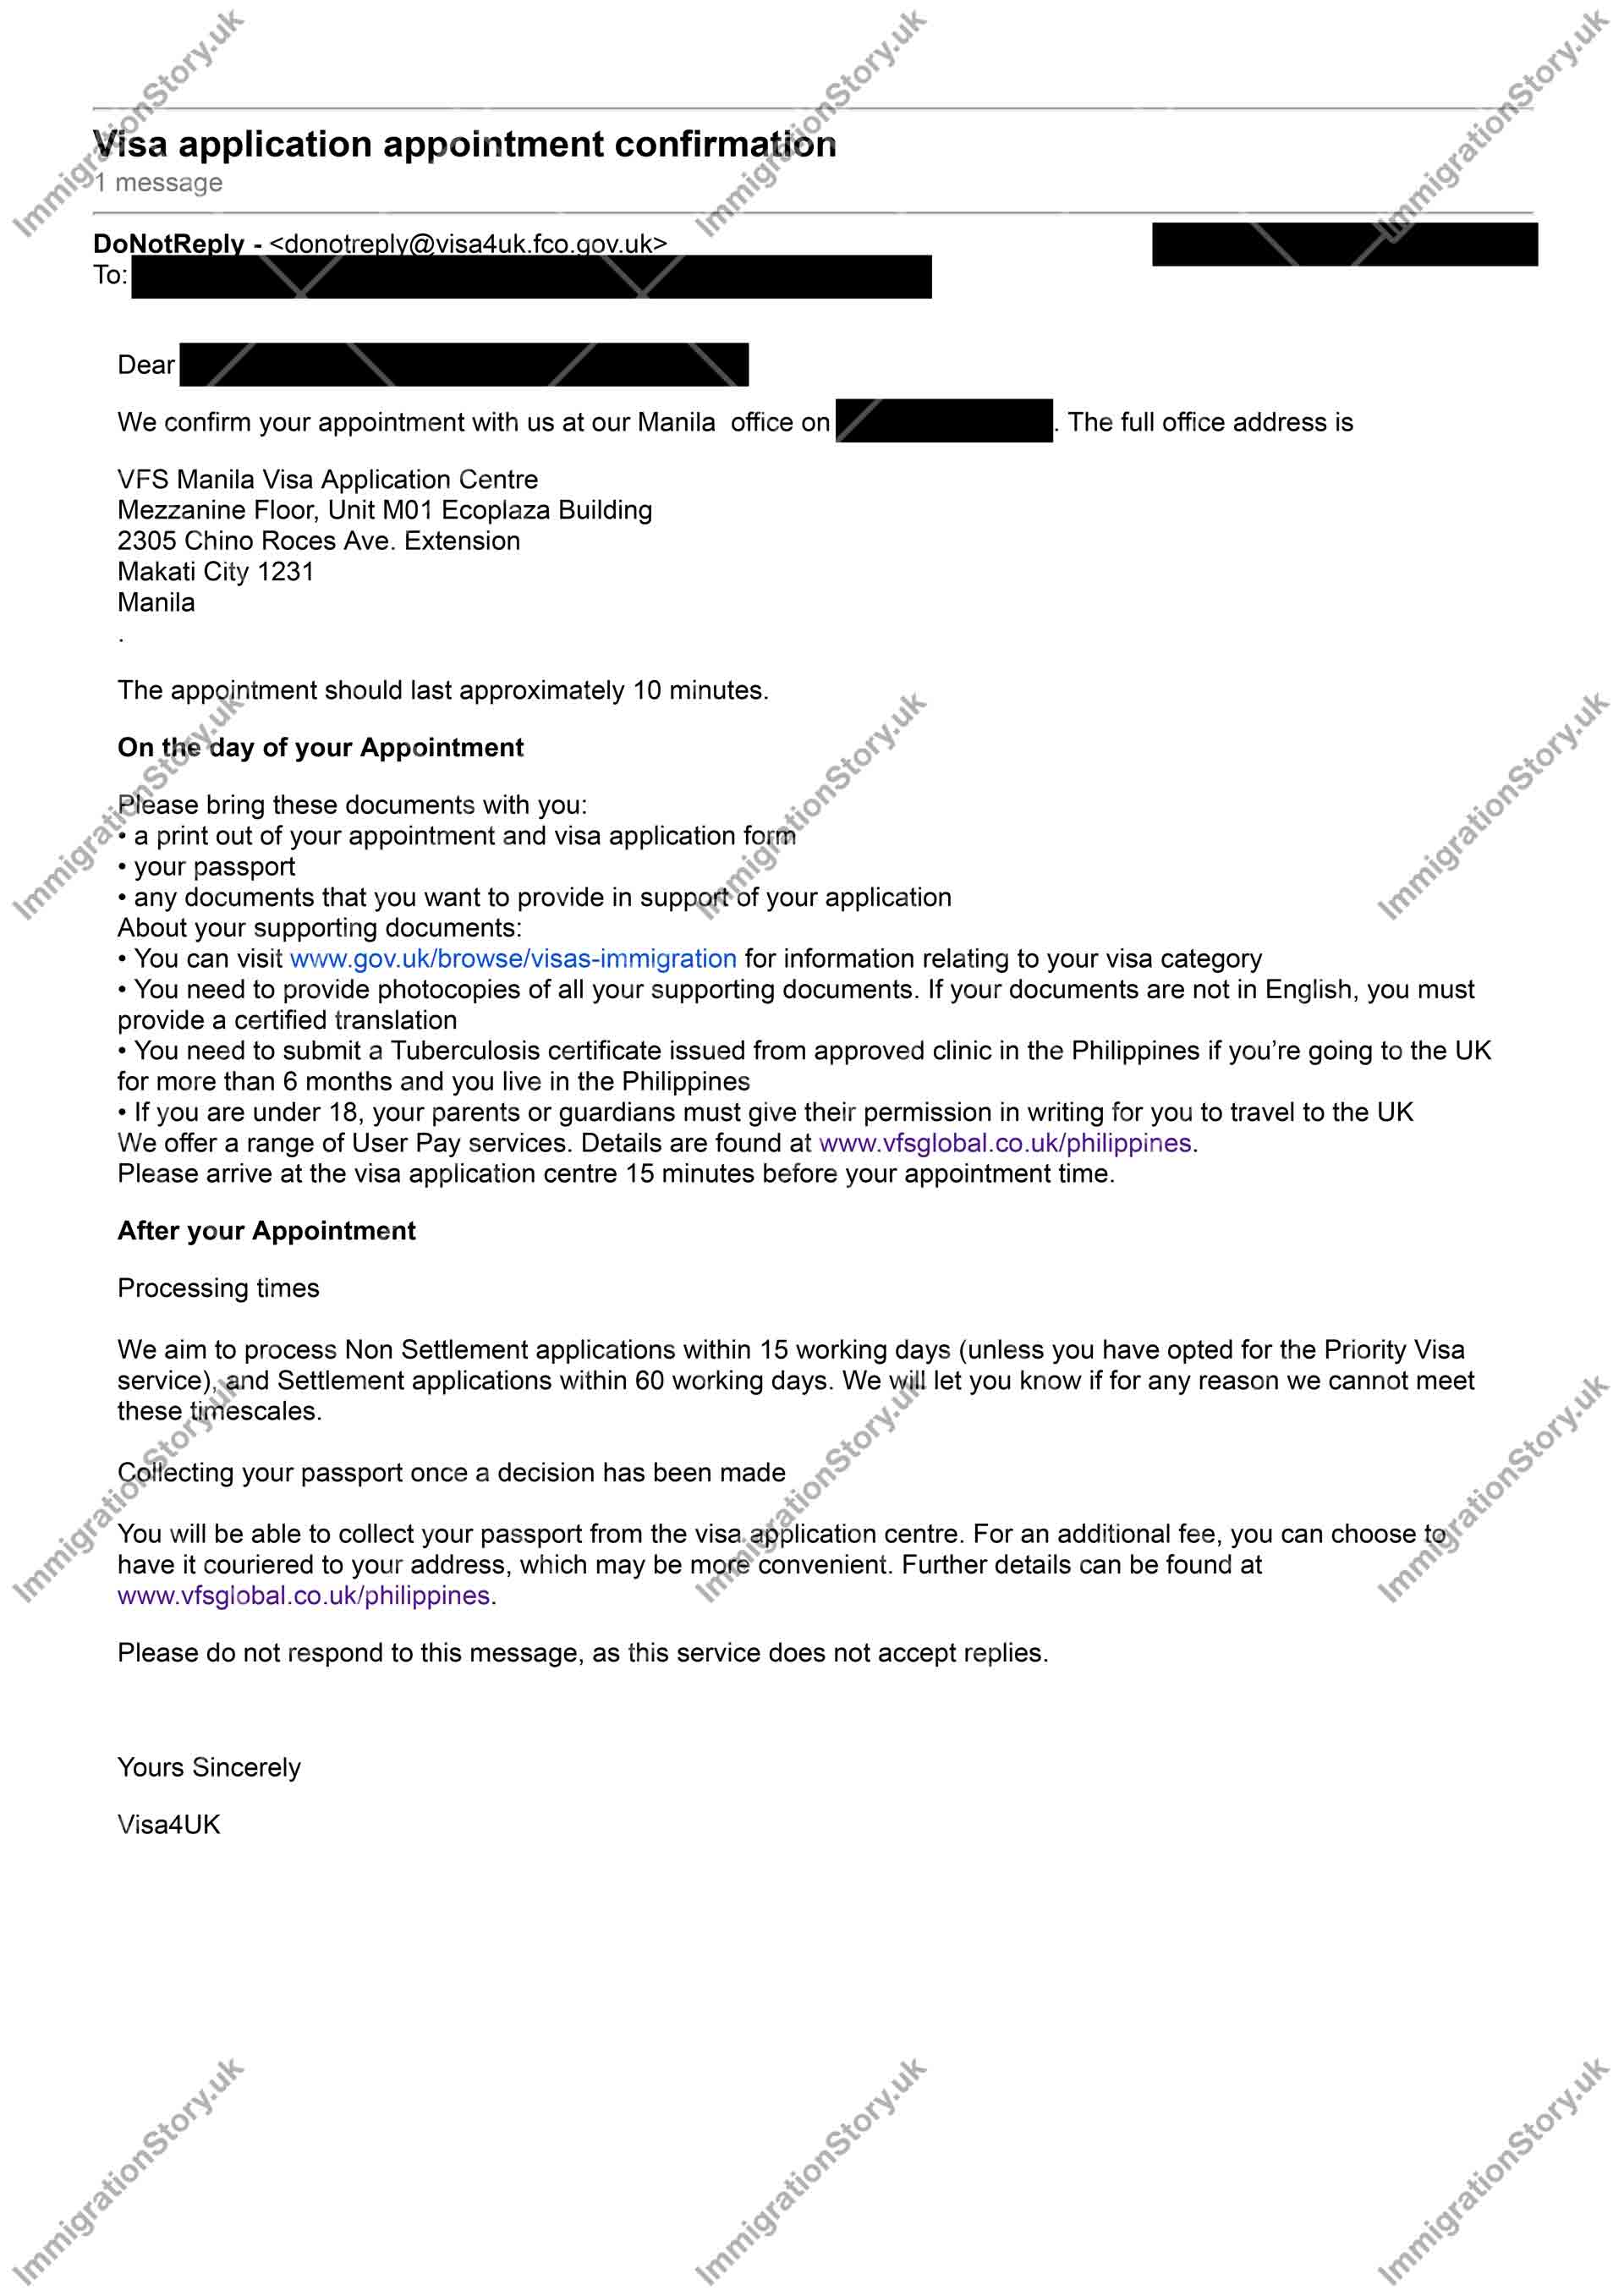
This is a print-out of your appointment confirmation email which will be sent to you once you book your visa application appointment.
-
Confirmation of payment of the Immigration Health Surcharge for you and your accompanying family members
Healthcare is free in the UK via the NHS. The Immigration Health Surcharge was introduced in 2015 to deal with the issue of medical tourism1 in England, where people visit the country to get free treatment, and then leave. It requires immigrants moving to the UK for more than six months to pay the surcharge, which gives them eligibility to utilise the NHS for free, like those resident in the UK.
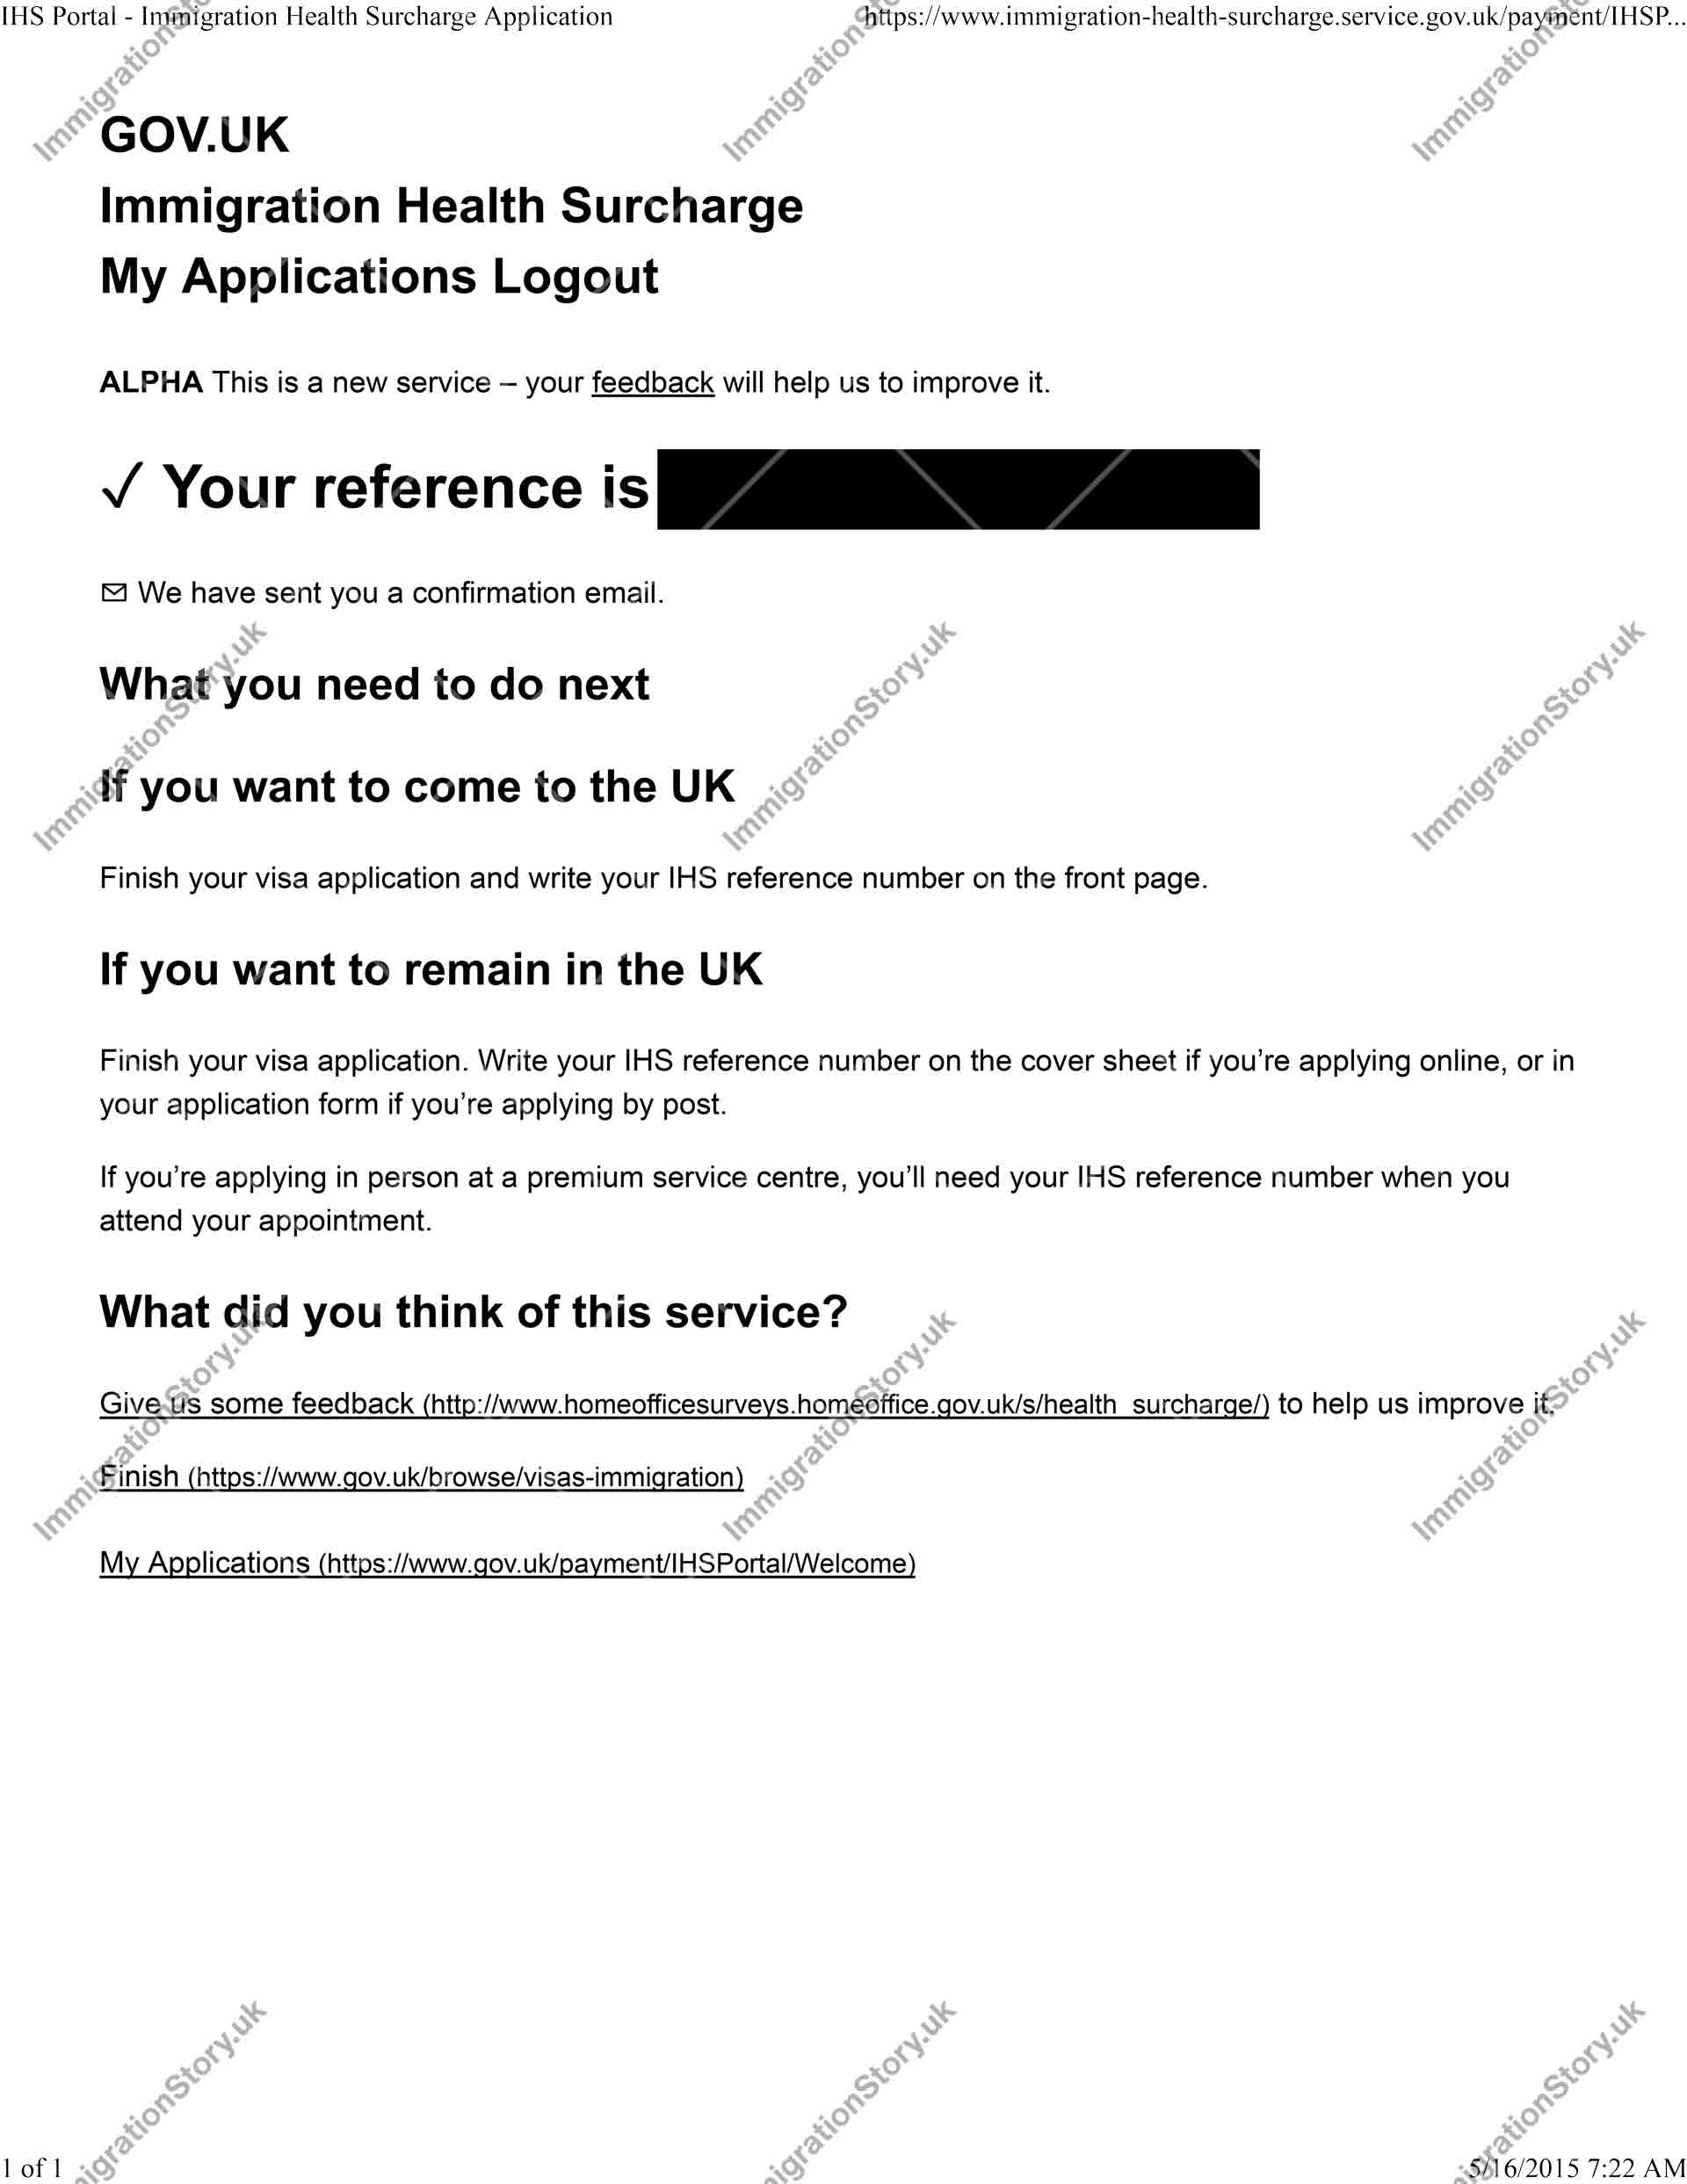
This is a print-out of the IHS Reference page you are shown after you have paid the IHS. This will also be emailed to you. In 2015 the fee was £200.00 per person per year, so for myself and my spouse we paid £2,000.00 altogether as we were two people applying for five years each. We were charged in US Dollars as the application was done from the Philippines – the final amount at the time was US$3,120.00.
The fee was raised from £200.00 to £400.00 per person per year in 2018, and this is still the case as of the time of writing in August 2020. It is expected to increase to £624.00 per person per year in October 2020.
-
Priority visa payment confirmation (if applicable)

As the company wanted to get us to the UK as soon as possible we’ve availed of the Priority Visa service in our applications. Back in 2015, this was only available to people who have travelled without difficulty to the UK, USA, Australia, New Zealand, Canada, or a Schengen country in the last five years, and costed PHP 8,400.00 (~£120 at the time) per person.
Given our visits to New Zealand we were qualified to avail of the priority service. This allowed us to get the results within three to five working days.
-
Evidence of meeting the English language requirement

You need to demonstrate that you have a good knowledge of the English language as part of your application. This can be done in two ways:
- either get a UK NARIC Statement which confirms that your education from outside the UK is equivalent to one inside the UK and that you meet the English language requirement; for this you will need to send them:
- a certificate from your university stating that English was the medium of instruction
- a copy of your diploma
- a certified English translation of your diploma (if needed)
- a copy of your final transcript
- payment for the Visas and Nationality service
- or take and pass an approved English language test such as IELTS (which is what I’ve done)
There is a separate chapter dedicated to preparing for the IELTS English Language Test (this applies to other English language tests as well) which details what you need to do, what the process entails, and what the costs are.
Nationals of some countries are exempt from this requirement. The Philippines is not one of them so this was something that I needed to do.
My spouse did not need to provide any evidence of meeting the English language requirement at this time, as back in 2015 (and this is still true in 2020), this requirement is not something that dependants of Tier 2 (General) applicants will have to meet.
While strictly not required (as I’ve already submitted the IELTS certificate), I’ve also included the following supporting documentation as part of the visa application:
- a copy of my diploma
- a certified English translation of my diploma (as it was in Latin)
- a certificate from my university that English was the medium of instruction
- either get a UK NARIC Statement which confirms that your education from outside the UK is equivalent to one inside the UK and that you meet the English language requirement; for this you will need to send them:
-
Original marriage certificate
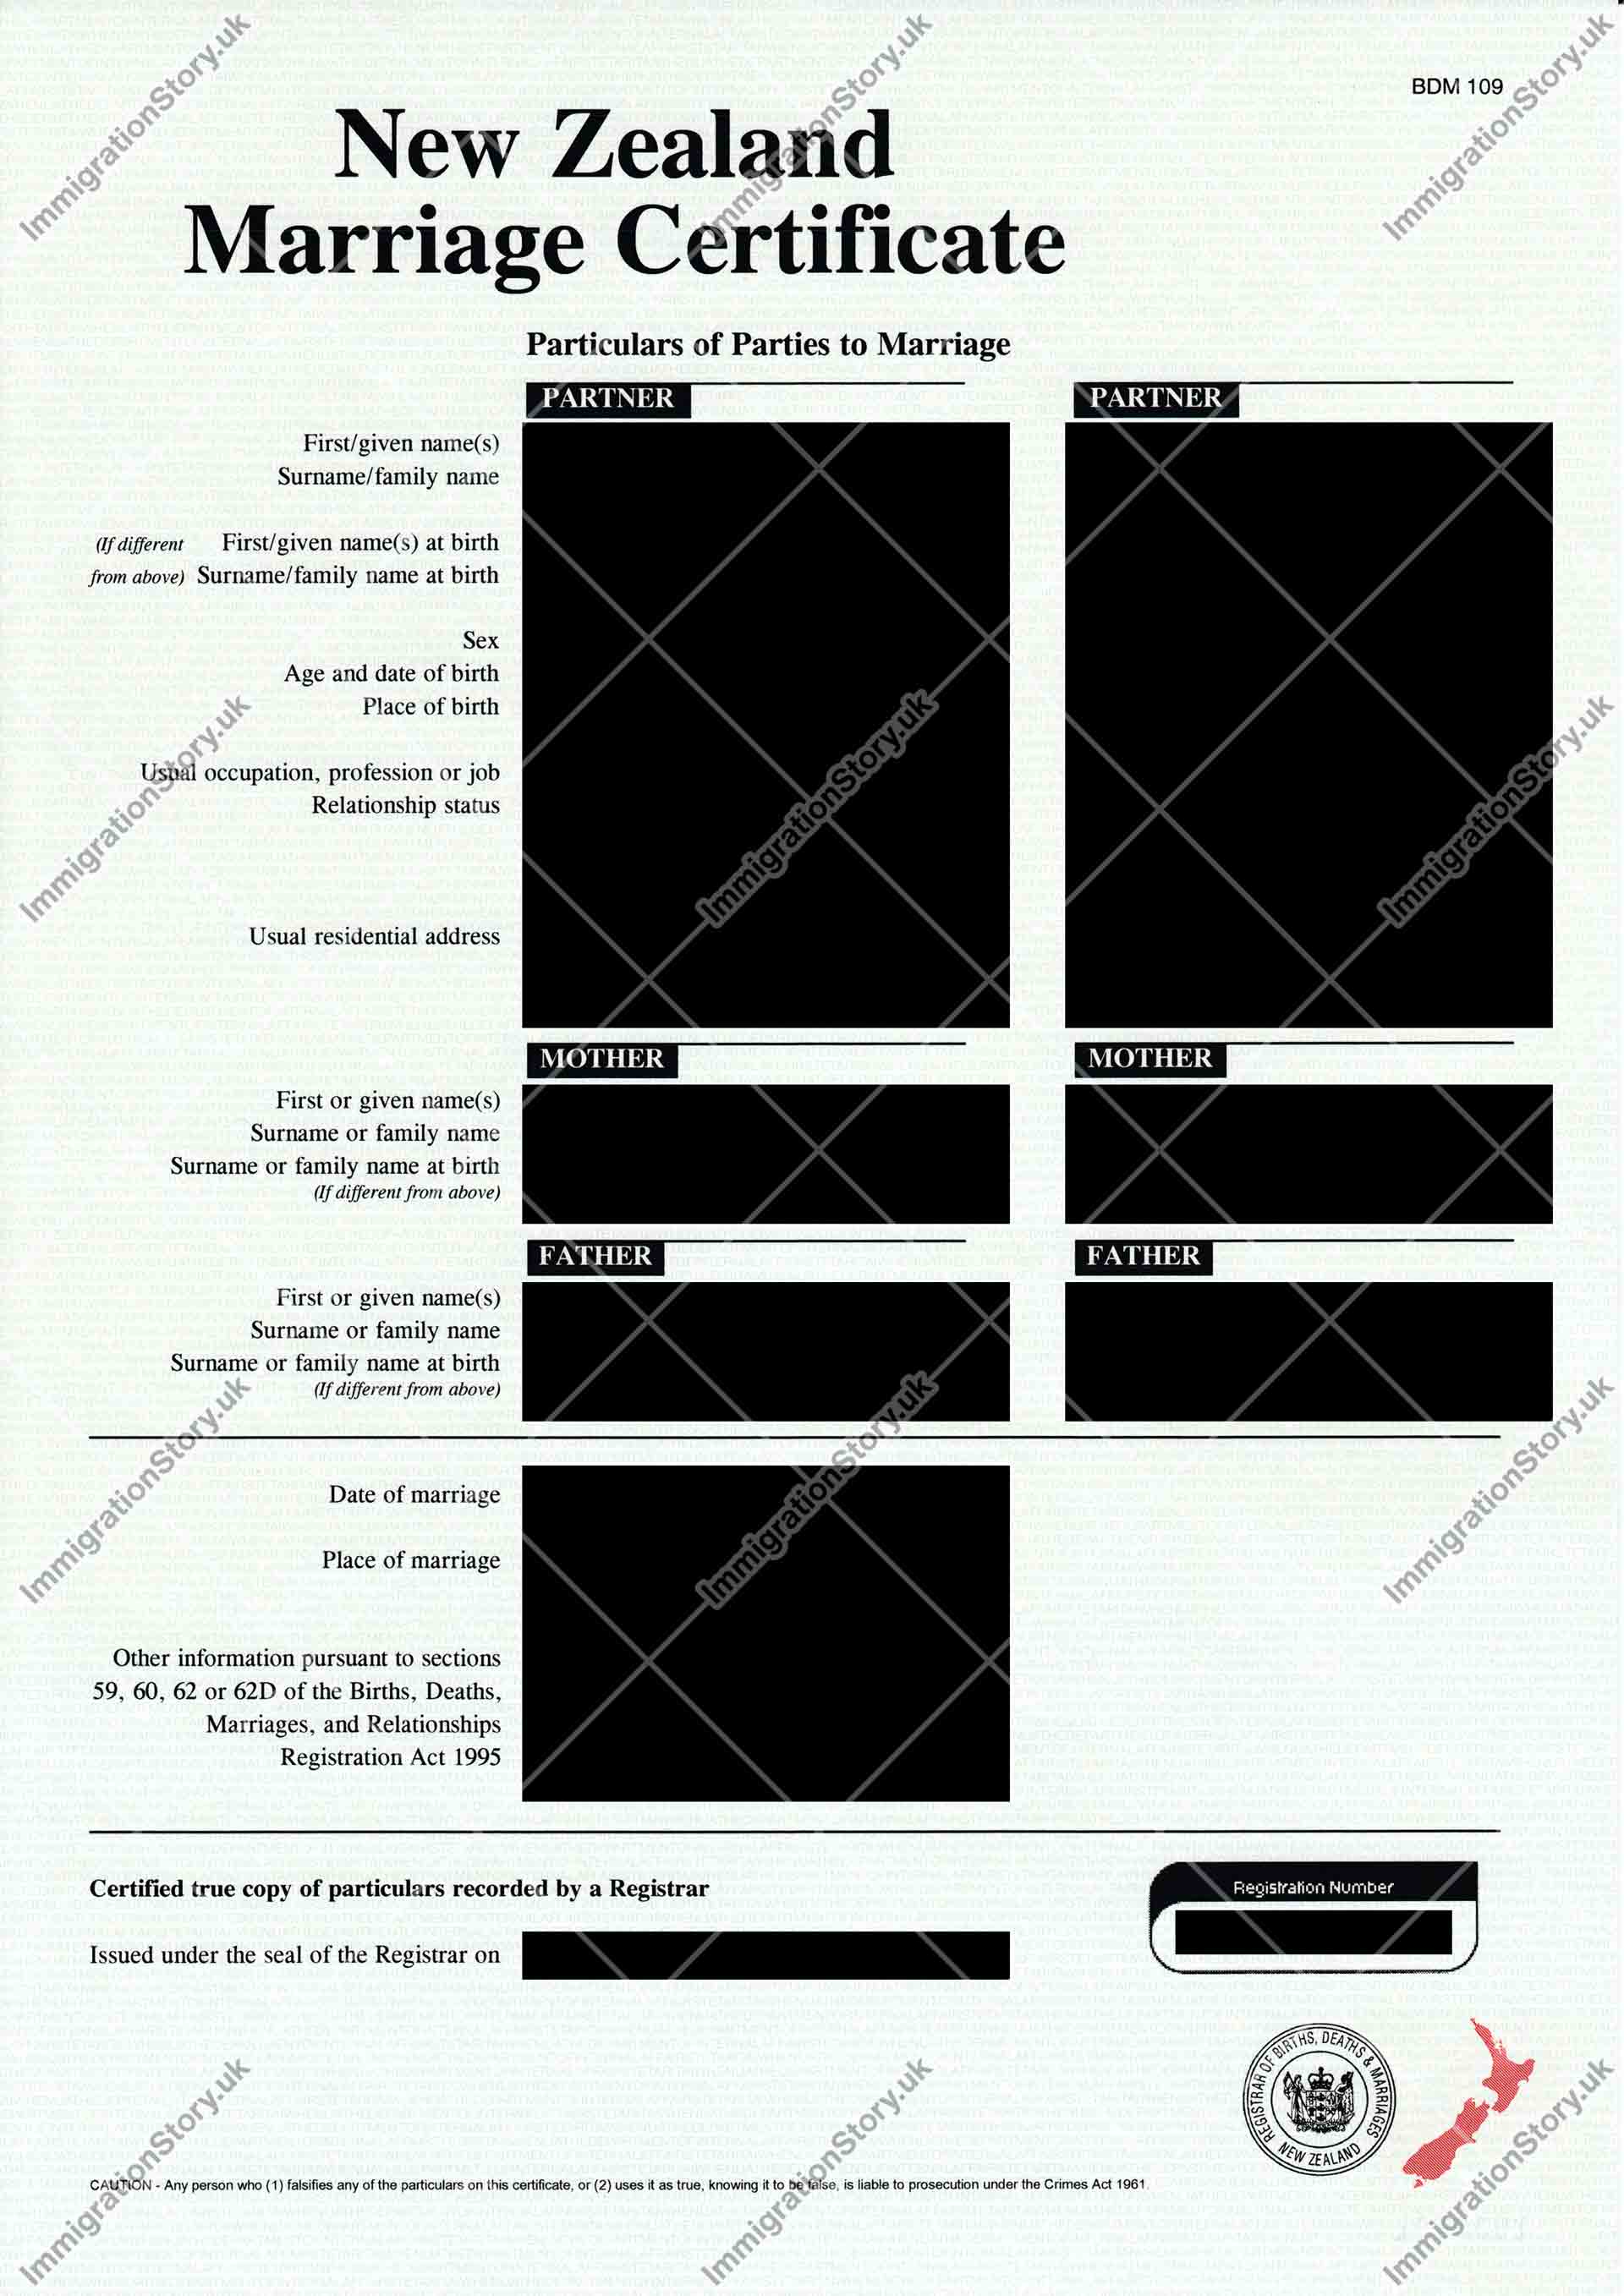
My spouse and I married in New Zealand so our marriage certificate is issued by the New Zealand government. Whenever a document is issued in one country for use in another, it needs to undergo a process called “legalisation” which allows the receiving country to certify the validity of that document.
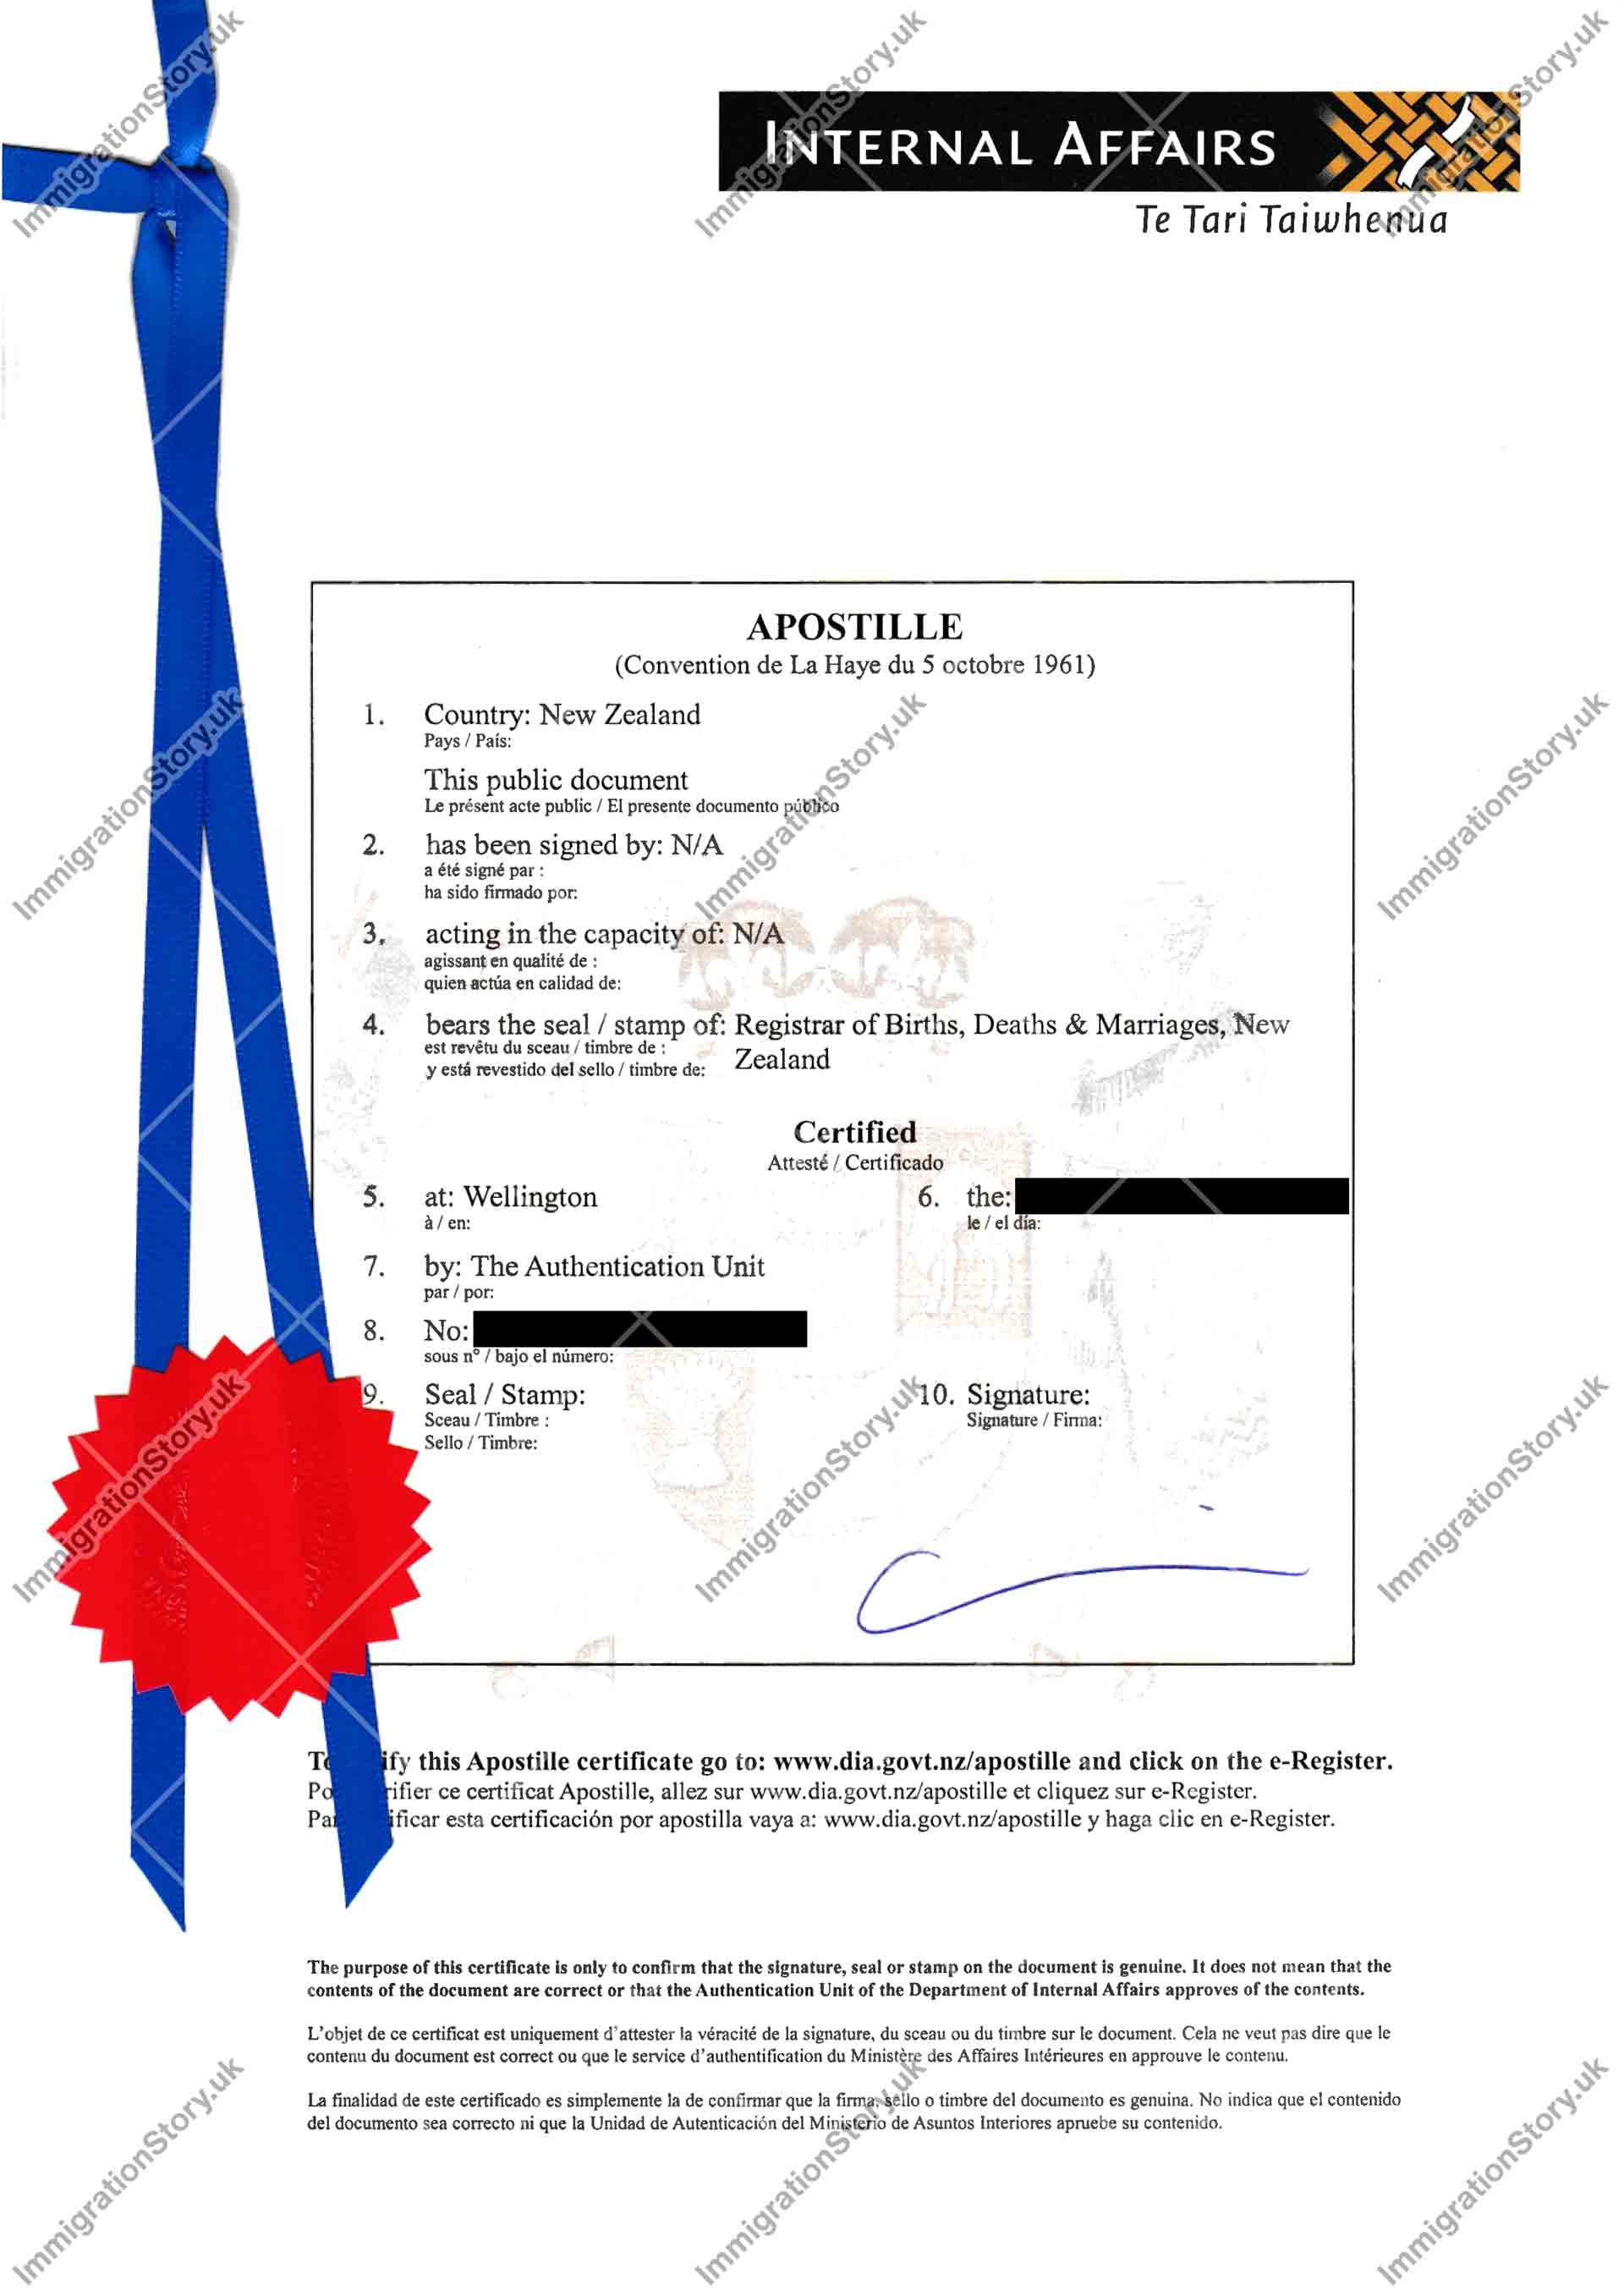
As New Zealand and the UK are both parties to Apostille Convention2, we needed to get the marriage certificate “apostilled” so that it will be valid for use in the UK. We opted to have both a paper and electronic apostille, which costed us NZ$32.00 (~£16 at the time) and NZ$15.00 (~£7 at the time) respectively.
If the country you were married in is not party to the Apostille Convention then you need to follow the document legalisation procedure for your country. This was the case in the Philippines back in 2015 (as they only joined the convention in 2019); hypothetically had we been married in our home country, instead of the Apostille process we would have had to undergo the authentication process of the Philippine Department of Foreign Affairs.
Colloquially this was known as the “blue ribbon” process, as a blue ribbon is physically attached to the document alongside the stamped authentication certificate. Other non-Apostille countries follow a similar mechanic.
-
Evidence that the relationship is genuine and subsisting
This was strictly not required for our route given that we were already submitting our marriage certificate, but nonetheless we’ve provided other evidence that our relationship is a genuine one:
- Joint bank account statements and certificates
- Holiday plane tickets and hotel bookings under both of our names
- Photos taken of us together, spread over long periods of time
-
Your original tuberculosis screening certificate
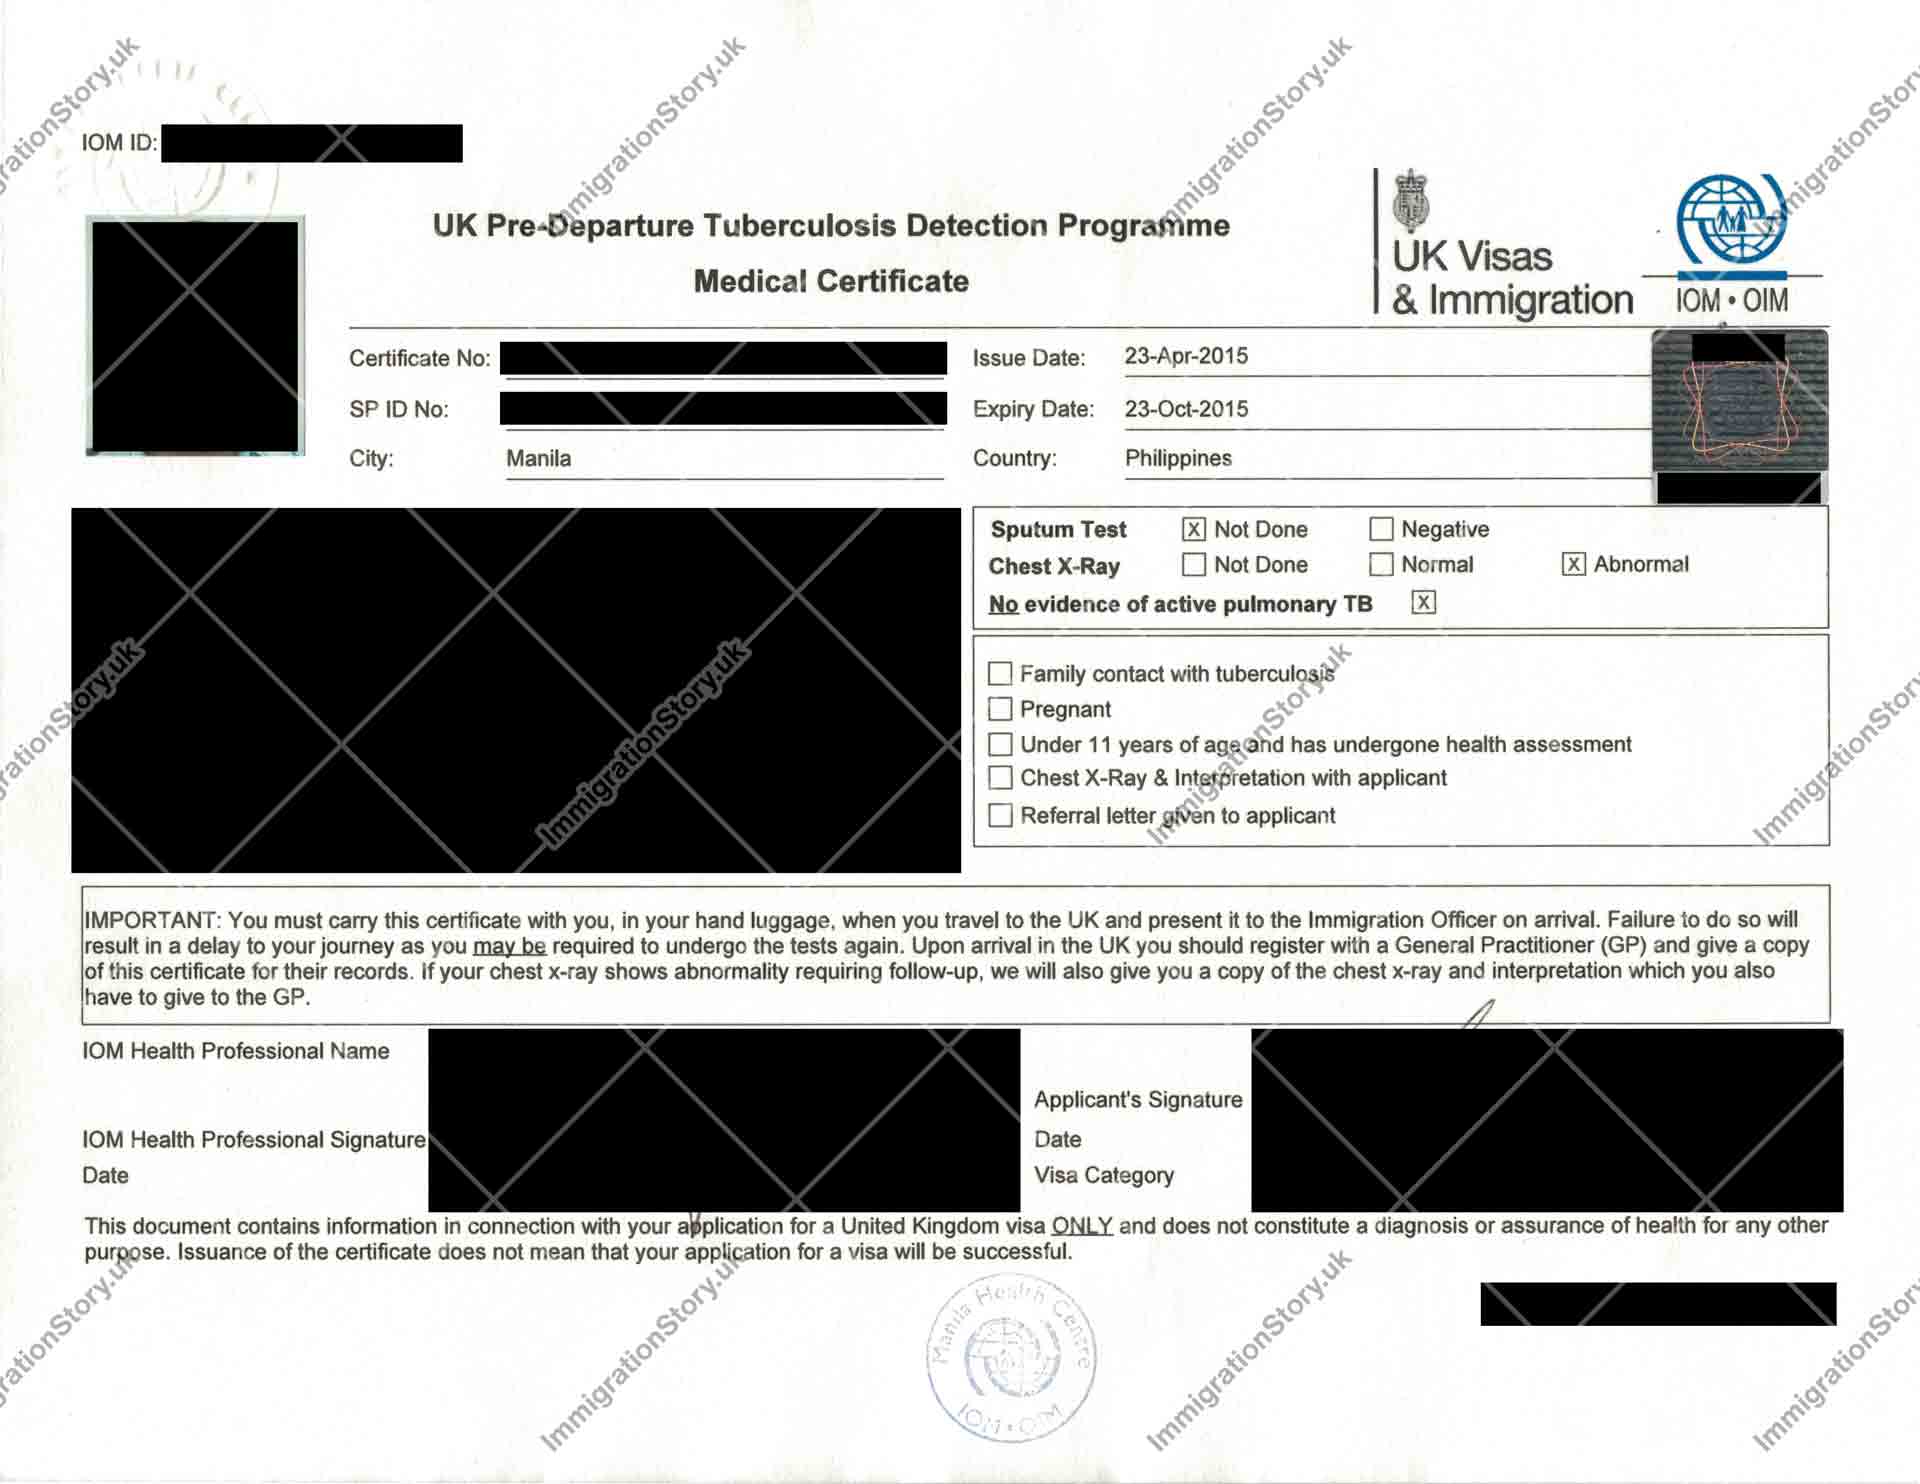
Residents of identified countries will need a tuberculosis test from an approved testing centre before they can come to the UK.
As the Philippines is one of those identified countries, we booked an appointment with the International Organisation for Migration Health Centre to get tested for TB. The cost for this back in 2015 was PHP 3,200.00 (~£48 at the time) per person, and has since risen to PHP 3,600.00 (~£56) as of the time of writing in 2020.
You will examined and will be x-rayed. A qualified professional will assess the results and record their findings.
If you are found to be clear of TB, a time-limited “UK Pre-Departure Tuberculosis Detection Programme Medical Certificate” will be issued to you; ours was valid for six months from the date we were tested. Ensure that you time your application date so that it is when your certificate is valid. If your certificate expires and you still have not made a visa application, you will have to pay to get tested again.
If you are found to have tuberculosis then you will not be issued a certificate. The cost of treatment is not included in the testing fee. Once you have completed the full course of treatment, you will have to book another appointment and pay again to get tested.
The Home Office will only accept certificates from authorised test centres. Certificates from any other centre will not be accepted.
Should there be any other abnormalities noted then it will be recorded in the medical certificate. In my case, it was found that there is a medical issue in my right lung, but that it was not indicative of tuberculosis.
-
Your accompanying family members’ original tuberculosis screening certificate
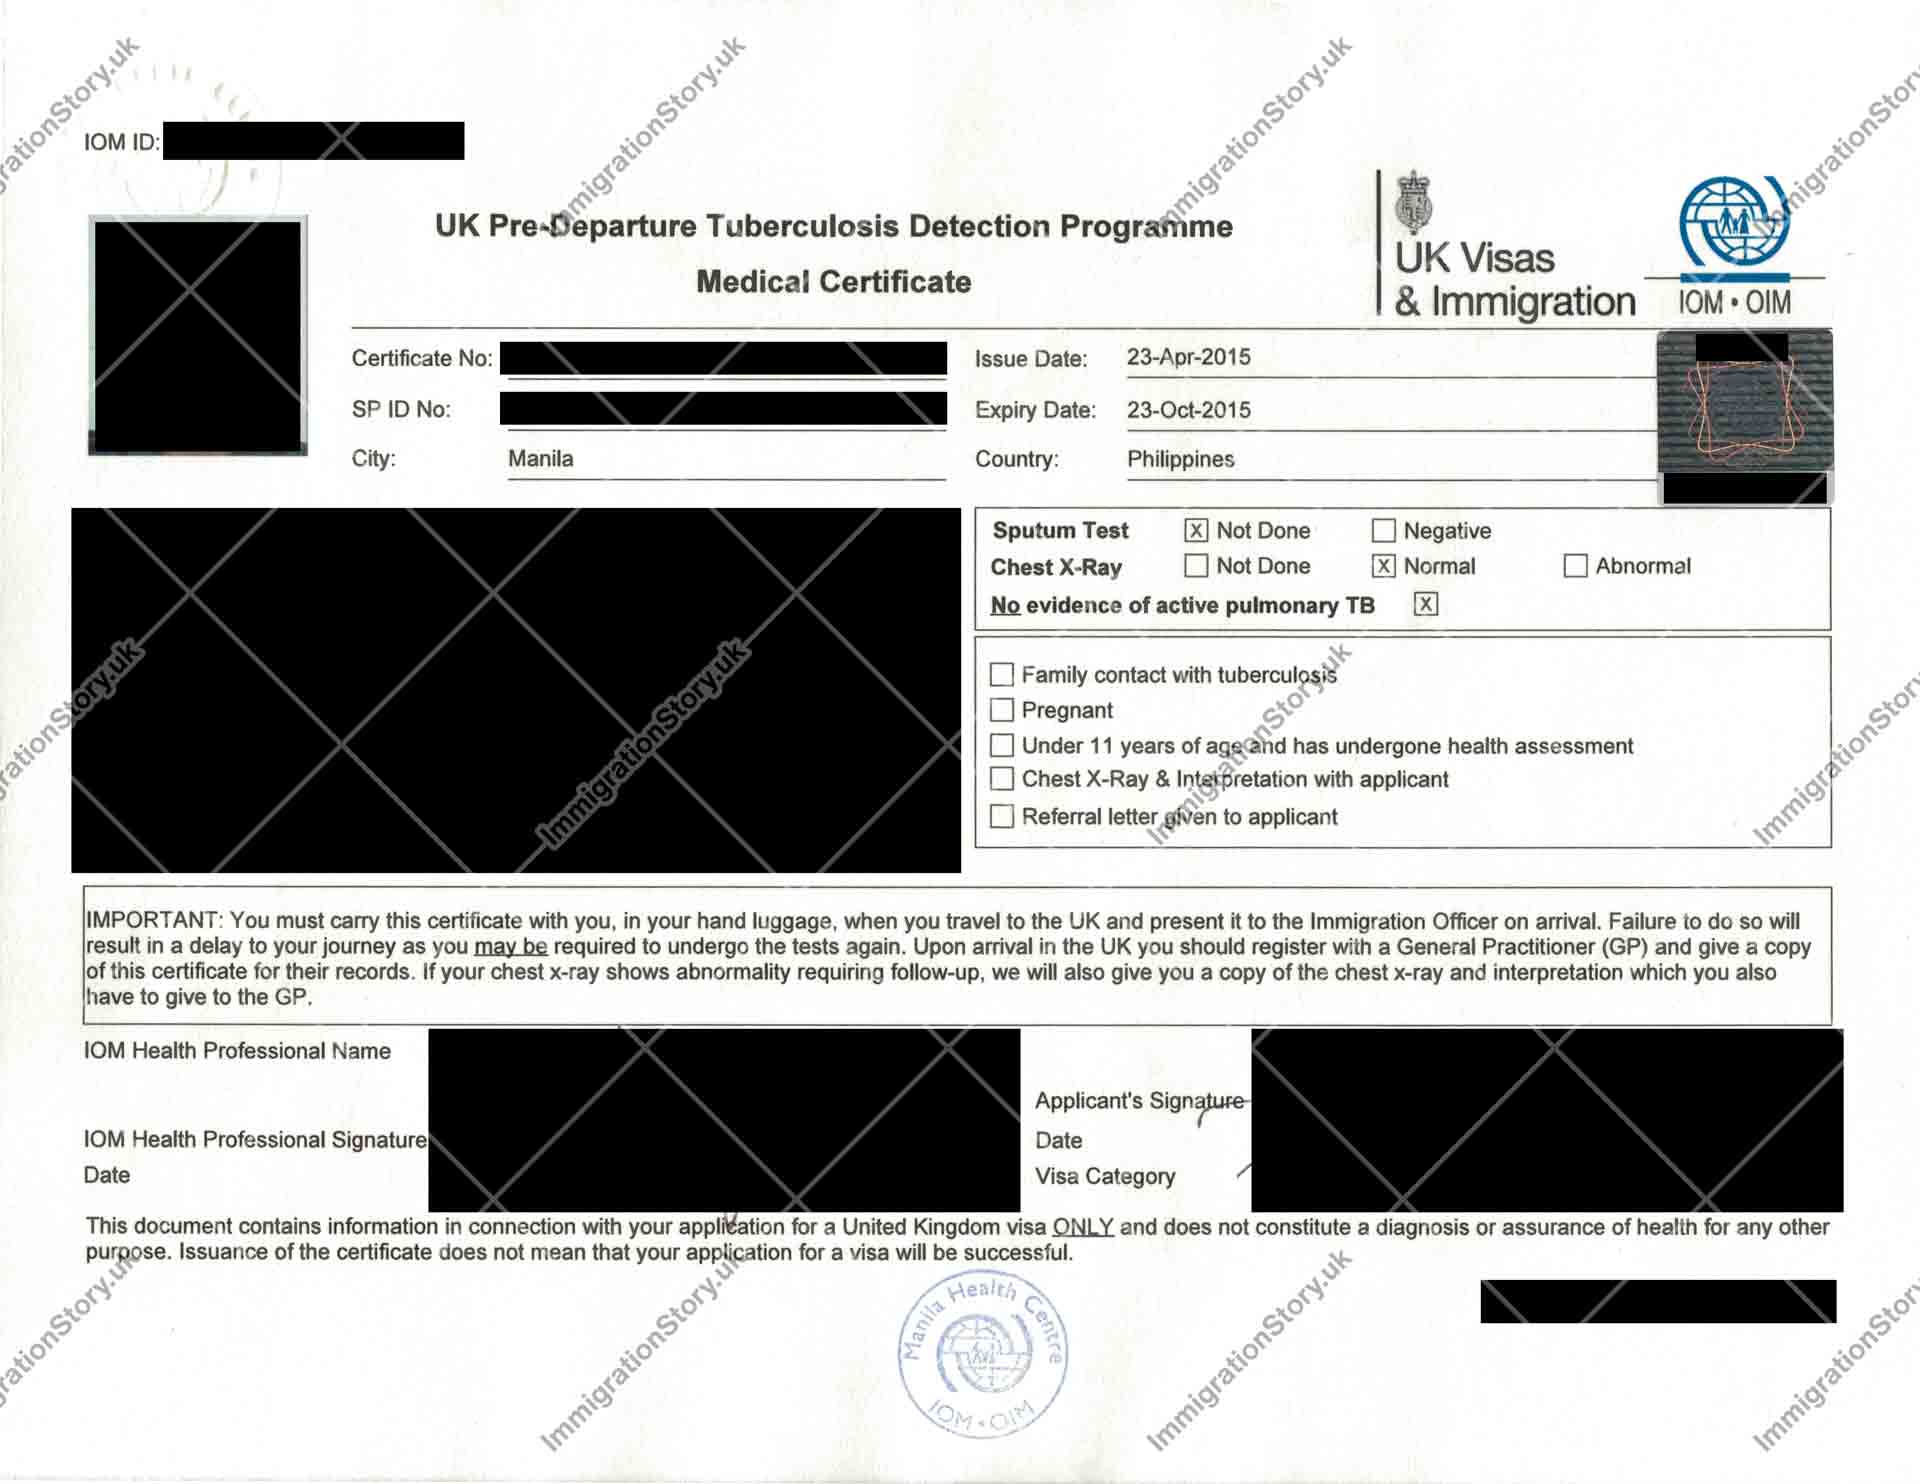
Any dependants you have who is also applying to come to the UK will need to undergo the screening as described in the previous point, if they are a resident of one of the identified countries.
-
Proof of maintenance funds for dependants
You must show that you have sufficient funds to maintain your dependants in the UK. As of 2020, this is £630 per dependant, and you must show that you’ve held the funds in your bank account for at least three months prior to the date of the application.
Strictly we did not need to submit any additional document as the company sponsoring us is an A-listed sponsor, and has indicated on the certificate of sponsorship that they are certifying maintenance for us. Despite this, we still submitted three months’ worth of bank statements as well as a certificate of funds and placement from the bank as supporting documents. As this is a long-standing account opened in 2010 that we jointly held under both of our names, the statements doubled as evidence that our relationship was genuine.
Requirements for the sponsor
The company sponsoring you to come to the UK will need to apply for a certificate of sponsorship with the Home Office, and assign that to you. There are two kinds3 of certificates of sponsorship – Restricted, and Unrestricted.
As I (the candidate) am outside of the UK and I do not meet the annual salary criteria of (as of the time of writing) £159,600 annually, the company needed to apply for a restricted certificate of sponsorship for me. Restricted certificates are limited in number and are made available in batches, and the company must conduct what’s known as a “Resident Labour Market Test” before it can be requested.
The Resident Labour Market Test essentially requires the sponsor to advertise the job for 28 days to ensure that there are no suitable workers already living in the UK for the role, meaning the vacancy is indeed genuine and can’t be filled by someone already resident locally. If someone is available in the UK for the vacancy then the company has failed the Resident Labour Market Test and thus cannot issue you the certificate of sponsorship; your application (should you still decide to go through with it) will be rejected and your visa will be denied.
Sponsors found to not have conducted the Resident Market Labour Test properly can have their sponsor license revoked. If you are already in the UK and as a result of an investigation, the Home Office revokes the license of your sponsor, what will happen is:
- Your certificate of sponsorship will immediately get cancelled
- Your and your dependant’s visas will be curtailed and will end in 60 days or however long you have left, whichever of the two is shorter
- You and your dependants will have the remaining time (60 days or less) to either leave the UK, or find and switch sponsors
It is very important that you are certain that your sponsor is legitimate and that they are following the immigration rules required.
Once the application for the certificate of sponsorship is granted by the Home Office, the company then assigned the certificate of sponsorship to me – this means that they are now formally declaring that they are sponsoring me to come to the UK. An assigned certificate of sponsorship is required to apply for a Tier 2 (General) visa.
A word of warning
Note that in the UK, only OISC-registered immigration advisers can legally give immigration advice. While I hope that I can give you an idea of what the process entails given the recounting here of my experiences, be mindful that this is specific to my case and may not necessarily apply to you or to anyone else.
Immigration law is exceedingly complex. As I am not an immigration adviser and that the strategy we’ve taken in our applications is bespoke to my and my partner’s route and unique state of affairs, the information here is not and should not be constituted as legal advice. If you have any questions regarding your particular circumstances, it is best that you reach out to a qualified immigration adviser who can assess your situation and provide open and honest guidance tailored to your case.
If you decide to do this and seek guidance and/or support from a solicitor (especially if you know that your scenario is a complex one), you must protect yourself from fraud4 by ensuring that you only go to an OISC-registered immigration adviser.